

-

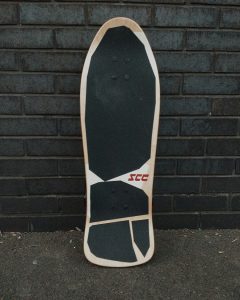
- Bottom
-
- Topside
-
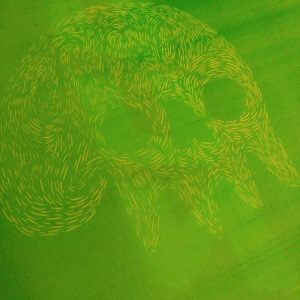
- Silkscreen exposure
Last month, I made the final touches to my custom skateboard. It's been at least 6 months since I first purchased the blank deck from America for a measly £30 (bargain!). From what started as a quick setup to build and go skating with, I soon became obsessed with the idea of creating a custom graphic and adding as many details as possible. I had a fascination in skateboards from the 80s that had plastic rails, tipex covered griptape, wear and tear and alot of character. For a brief month or so I got to ride my Uncles original Powell Bug board and loved the way it soaked up turns. It was a really fun board which I was keen to continue riding until he made the decision to put it up for auction. So that's why I went for this type of board. The custom stuff was just an after thought. This is certainly no show piece but a full working board that I intend to wreck.
A brief recap of my process:
- Sand down board ready for painting
- Photoshop together a few rough ideas of graphics to stencil or silkscreen
- Cut out graphics in paper to judge size of area to mask.
- Mask areas I want spray paint
- Spray paint both topside and the bottom of the deck
- Install black rails, tailtap
- Settle on a design to try silkscreening with
- Badger my good friend Josh into exposing a screen and getting a weekend sorted to try printing
- In the meantime, saw and glue together something to hold the board in place ready for printing
- Decide on silkscreen ink and colour. Order Fire Red pot ready to print with.
- Umm and arrr over design
- Buy another board and start messing with that
- Badger Josh one last time to settle a date
- Screen gets exposed with design
- Get to London to print.
- Measure, think, wait - twice. Print - once
- Because the board is concave, ignore traditional silkscreen printing method and apply a custom solution. I roll the screen across the board whilst Josh pulls the ink through.
- First try fortune! Silkscreen done
- Mask and spray paint logo on topside of board
- Measure and figure out how to grip board
- Design griptape on the fly using paper cutouts and playing it by eye
- Slice grip to size and apply to board
- Fix trucks to board along with wheels and bearings
- Take for a skate
For a first try it came out surprisingly well. I'm stoked how it came together and I've ridden it load of times now both at the skatepark and on the streets - it works well across all of it.